

Summer is approaching. If you have just but one pair of comfy shorts, it’s time to make clones.
Materials
- One pair of comfy shorts to clone.
- One piece of fabric, size measured according to Step B below. This tutorial uses 2 different pieces of fabric to help you differentiate the back and front of the shorts, but this is not necessary, unless you’re out to annoy a symmetry-loving spouse.
- 2.5cm (1 inch) width elastic waistband, length measured based on your own waist.
Steps
A. Check the grain of your fabric, and position it to give stretch in the direction of the waistband. If the fabric is patterned, set your preferred orientation.
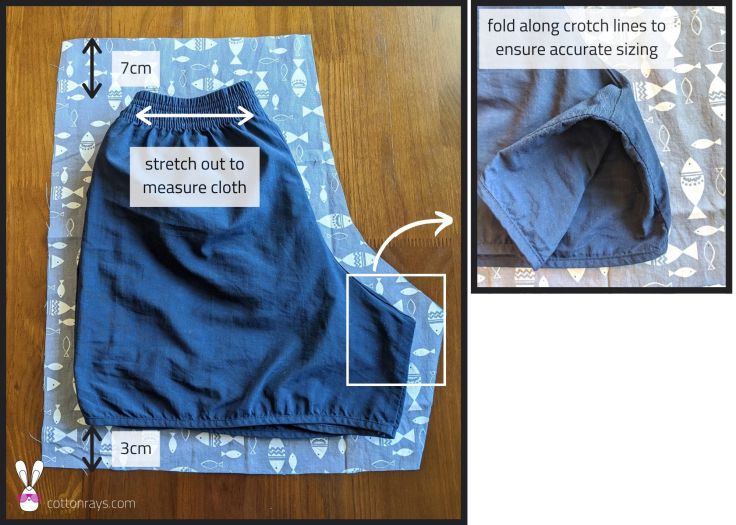
B. Fold your pair of comfy shorts in half and and place over the fabric. When folding your shorts, ensure that you fold along the crotch seams (see image) for accurate sizing. Trace and cut out the shape, leaving margins of 3cm all around, except at the top, where you’d leave 7cm for the waistband. For more butt room, accentuate the curvature and lower the tip of the crotch line.
C. Cut the first fabric piece from Step B, then use that piece as a template to cut out 3 more until you get 2 pairs of mirrored pieces, as pictured below.

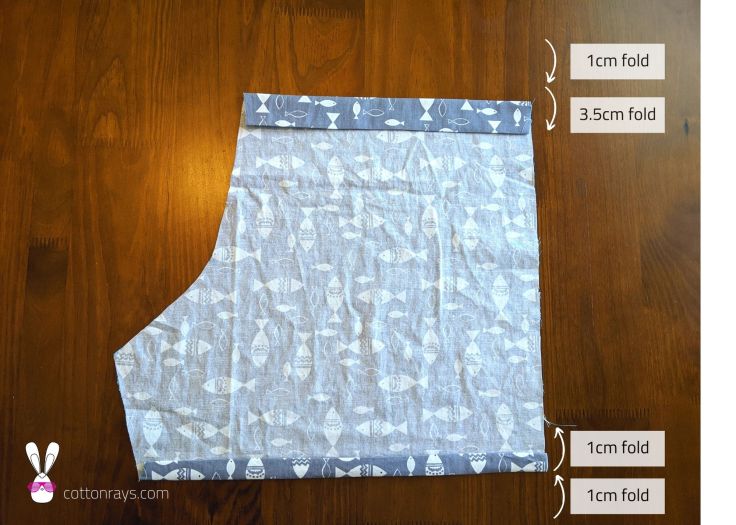
D. Use an iron to fold creases on all 4 fabric pieces. At the top, fold 1cm to hide the raw edge, and then fold 3.5cm again for the waistband slot. At the bottom, fold 1cm twice to form a hem.
E. Sew one pair of front-back pieces together using a French seam—i.e. sew wrong sides together first, then fold over and sew the right sides together to enclose the raw edge. Sew up the bottom hem using the creases you formed in Step D, then join the other edge with yet another French seam up the crotch area. Repeat this step for the other pair of front-back pieces.

F. At this point, you can ‘test wear’ the pieces to see if it fits. If they do, turn one leg piece wrong side out, and place it inside the other piece with right side out. This will result in the wrong fabric sides facing each other, which sets the stage for French seaming again. Sew the two leg pieces down the center, ensuring that seams are aligned.

G. Fold the waistband slot based on the creases made in Step D, then top stitch, ensuring that the size of slot is 3cm all around. Leave a 5cm gap at the end to insert the waistband elastic.

H. Determine the waistband elastic length based on your own waist and comfort level. Insert the elastic band into the slot and top stitch to close. Congratulations, you’ve one more pair of shorts for summer.


Leave a comment