
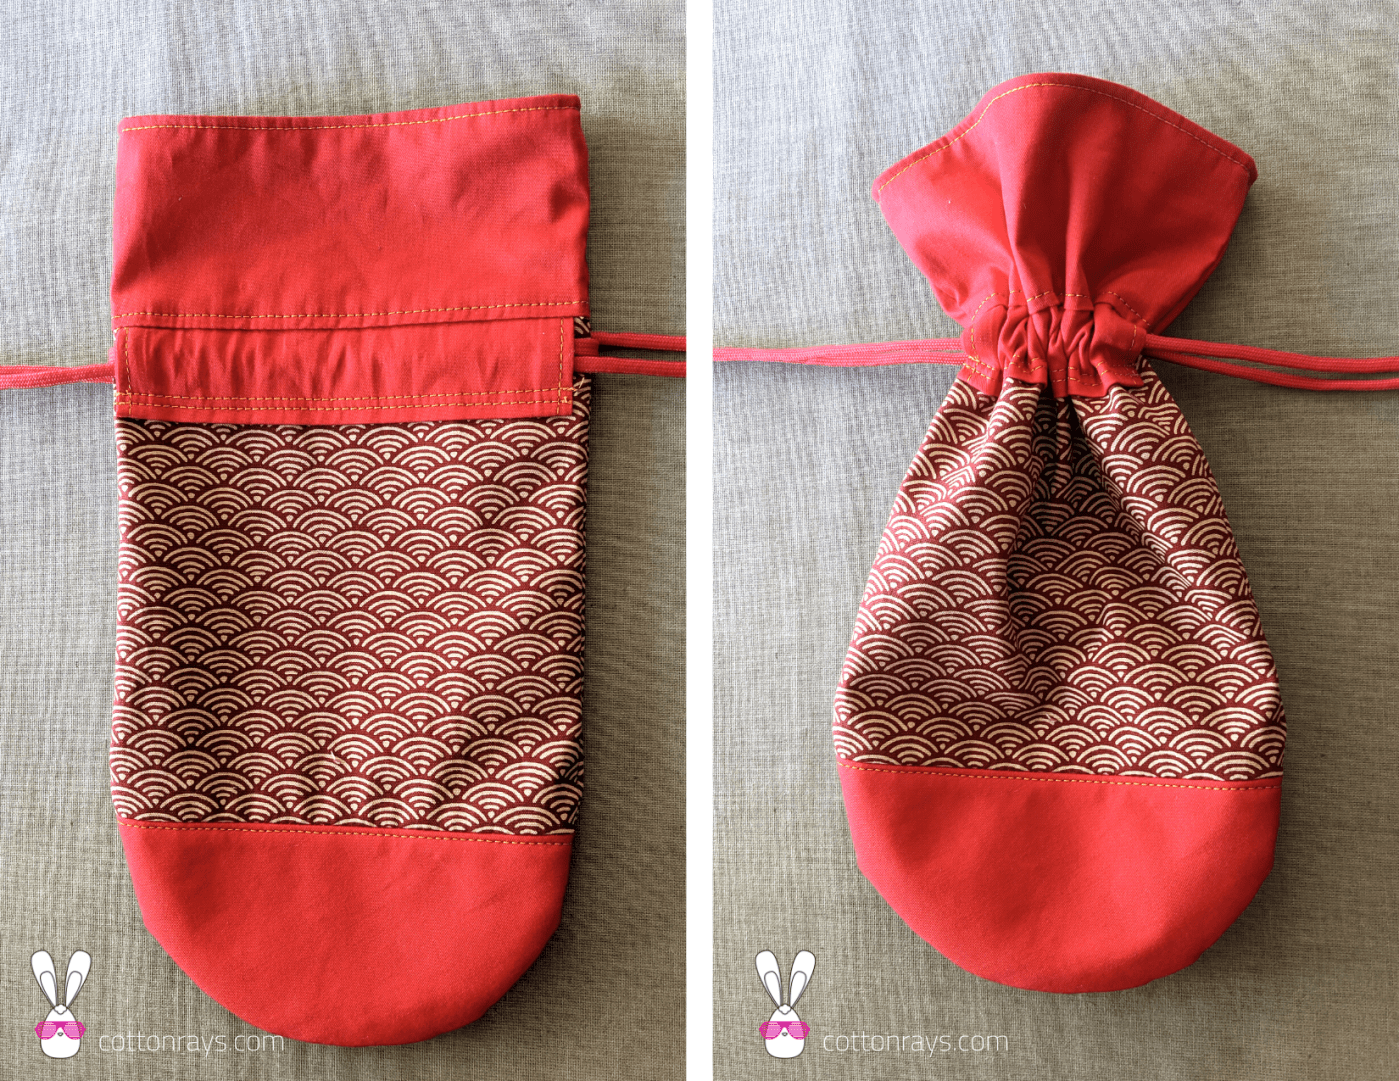
A pouch, shaped like a fish.
Are you hooked yet?
Materials

Steps
A. Iron all cloth pieces. Then, iron fleece to half-moon outer fabric.

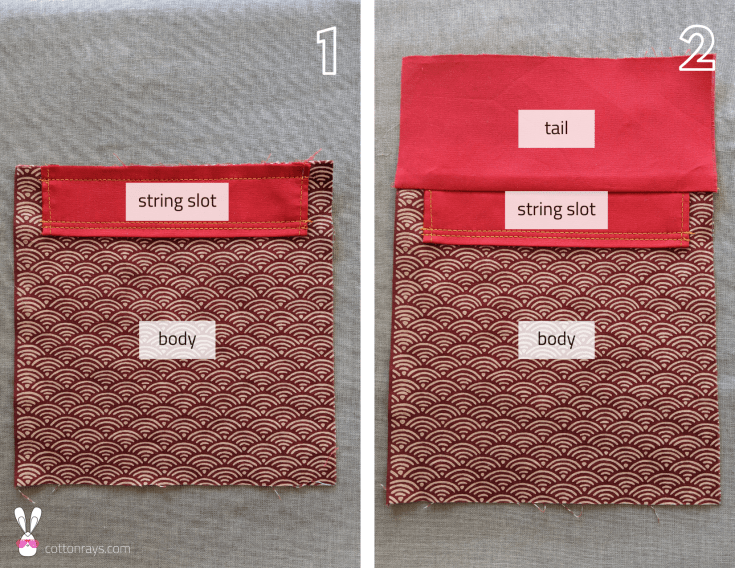
B. Now, we will make slots for the drawstring. With a 7 x 19cm cloth piece, fold in the edges twice, each time by 0.5cm. Then, fold the piece horizontally in half. Iron after each fold. Open up the horizontal fold before stitching up the twice-folded edges, ensuring that the resulting length is shorter than 18cm. Repeat for the other 7 x 19cm cloth piece.

C. Sew the string slot cloth piece to the 18 x 18cm outer fabric, which will form the body of the fish. Ensure that you don’t sew up the slot opening. The string slot will be at the tail end of the fish body, so ensure that the body fabric is orientated correctly. Next, sew the 9 x 18cm cloth piece to the body, which will form the tail of the fish, and top stitch.
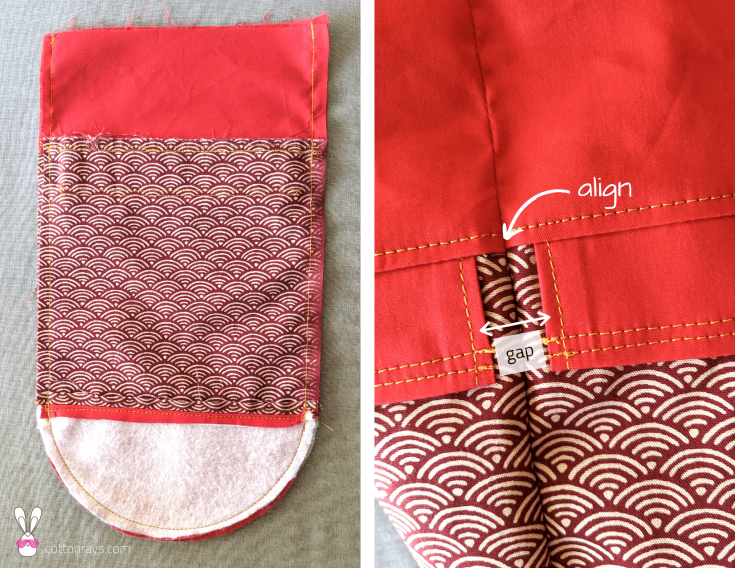
D. Sew the half-moon fabric piece to the body fabric, and top stitch.

E. Repeat steps C and D for the other side of the fish.
F. Sew the outer fabric pieces together, ensuring that panel edges line up, and that the string slot entrances are left open rather than stitched up.
G. Sew the inner fabric pieces together, inserting your label if desired. To position the label away from the drawstring area, use the outer fabric as a guide.

H. Place the outer fabric piece inside the inner fabric piece, and sew them right sides together, leaving a gap to turn the pouch right side out.


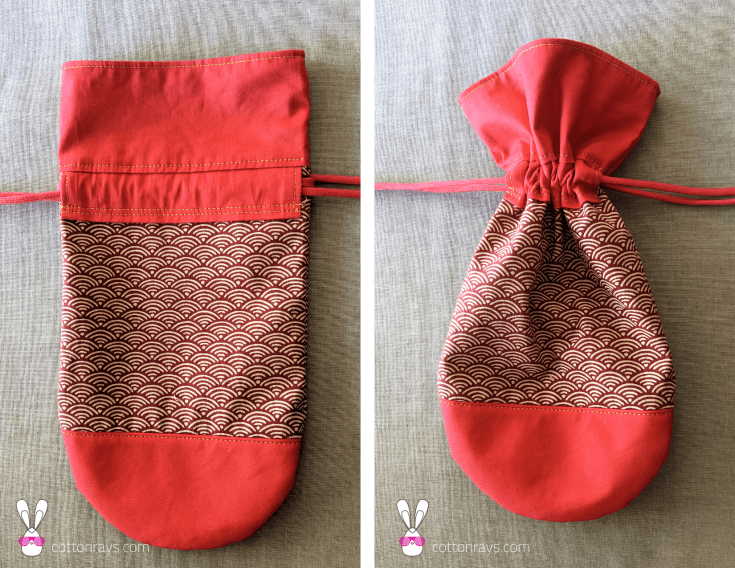
I. Flip out pouch from gap, top stitch to close, and finally, insert the string.

Leave a comment