

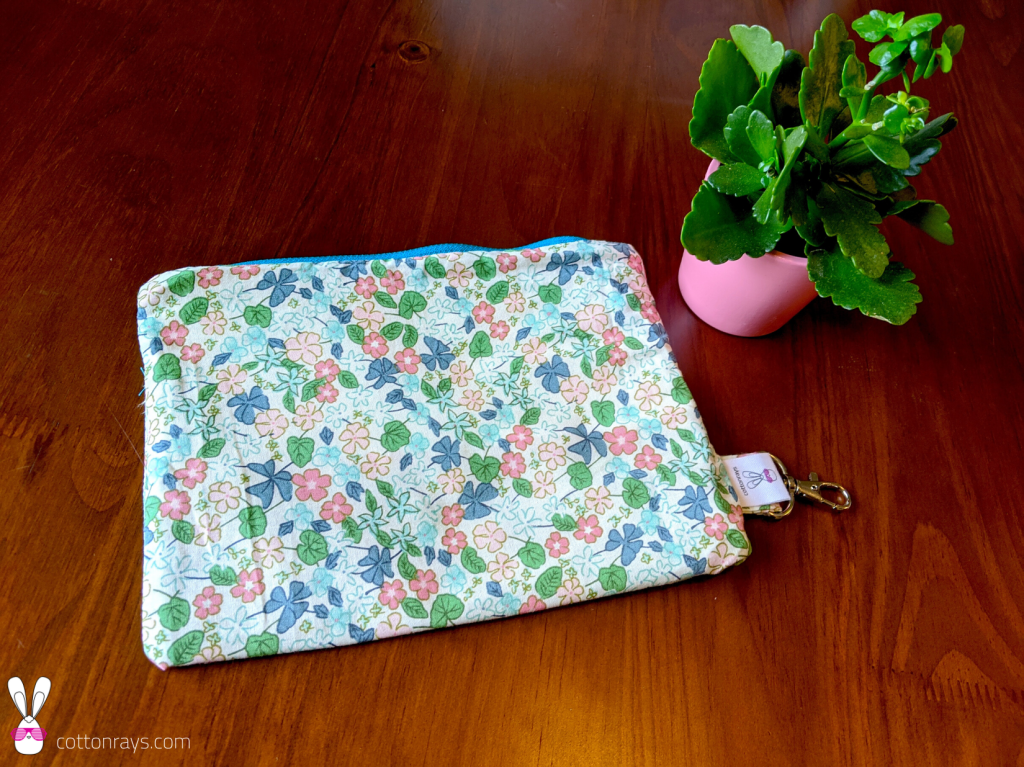
The two-tone design features a handy key ring on the inside so you’ll never lose your keys again. This example uses fusible fleece so that the pouch is soft to touch, but feel free to exclude it if you feel that your fabric is thick enough.
Materials

Steps
A. Iron the fleece to the top panels. Trim off excess edges.

B. Prepare the key ring tab by folding the two ends of the key ring tab cloth piece towards the center. Then fold along the center, tucking away the raw edges. Hot press with iron. The final piece will be 2.5 x 5cm.
C. Sew the folded key ring tab along its sides, and then secure both ends after inserting the key ring.
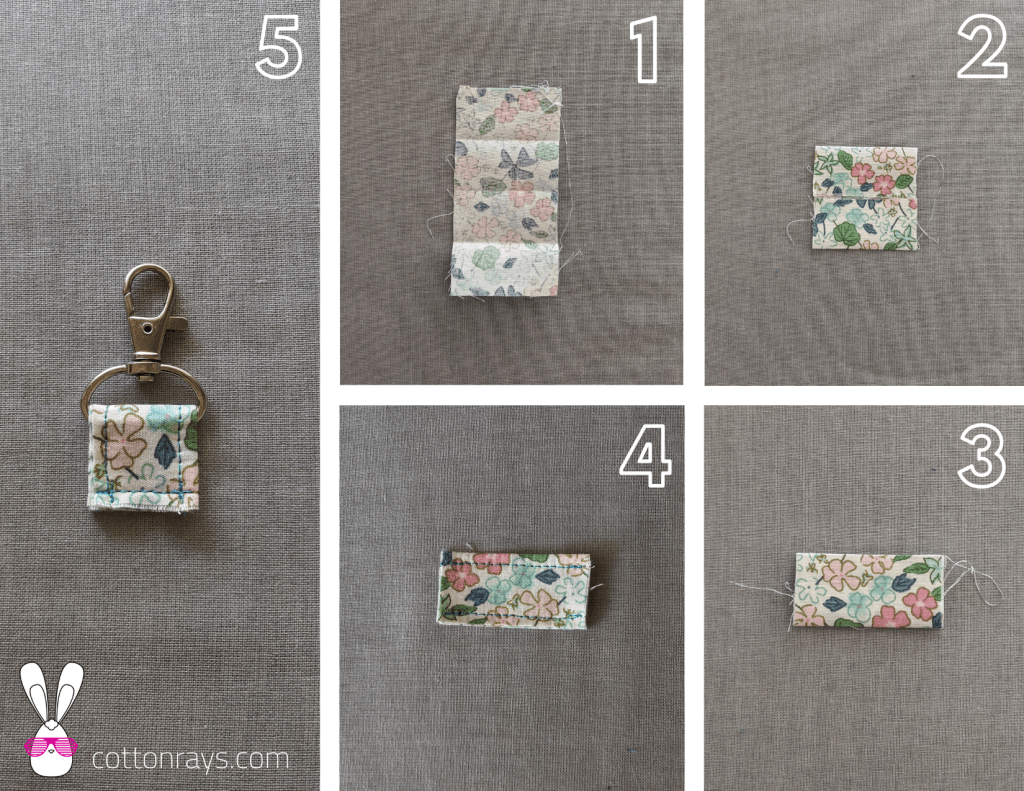
D. Repeat Step B for both zipper tab cloth pieces, resulting in final dimensions of 1.5 x 2.5cm each.
E. Shorten the zipper by cutting away the end with the smaller metal stopper—be careful not to cut off the zipper head. Next, sew the zipper tabs to zipper, getting as close as possible to edge. The final zipper with its tabs should be 2cm shorter than width of pouch, so that we can avoid sewing over the zipper tabs later when we sew up the sides of the pouch with a 1cm margin.

F. Determine your desired up-down orientation of top panels (e.g. if you’ve got words on your top panel pieces, you don’t want the words to be upside down). Sew the bottom edges of both top panels to the bottom panel, with right sides together

G. From the previous step, iron the raw edges open, and then top stitch.

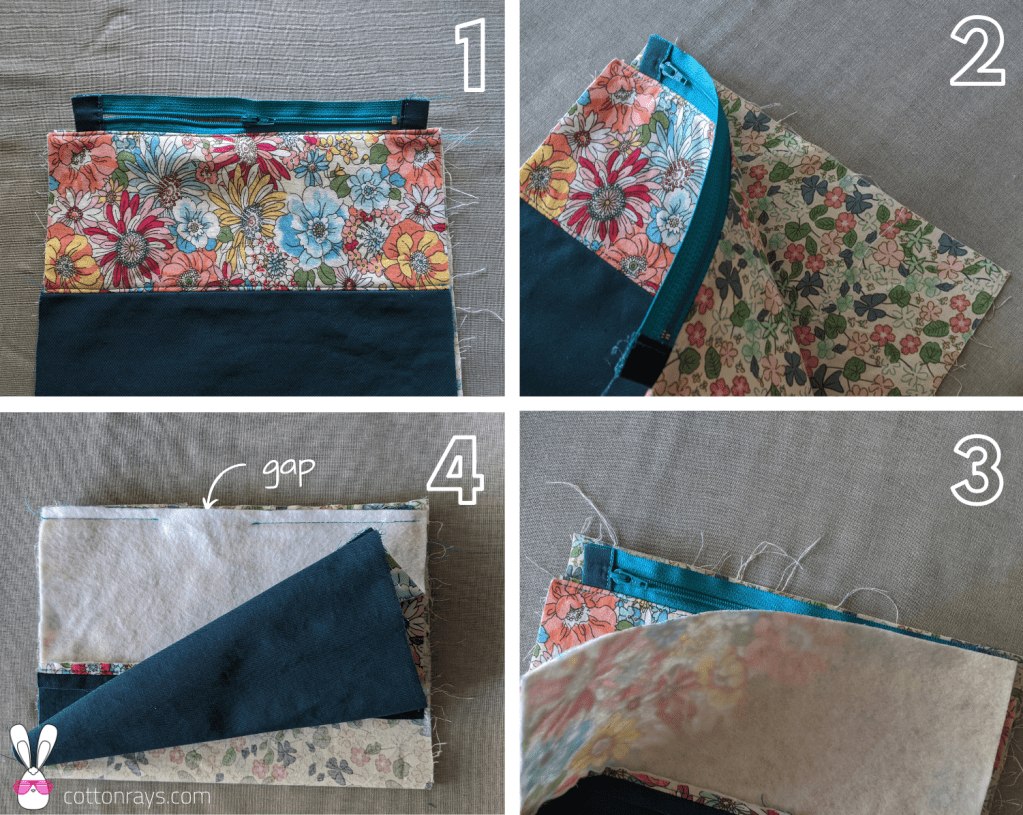
H. Now we attach the zipper. Place the outer and inner fabric pieces with their right sides together, and then sandwich the zipper in-between, with the top of the zipper facing the outer fabric. Sew all three together, pulling the zipper head out of the way as you get to it. After which, fold the outer and inner fabric pieces down, and do a top stitch that catches both pieces.
I. Repeat Step H for the other side of the zipper, but leaving a gap in the middle for us to flip the pouch out later. When top stitching, leave the same gap in the middle, and make sure not to sew onto other parts of the pouch.
J. Sew up the sides of the pouch after inserting the key ring (and if desired, your logo label) inside the lining compartment. Ensure to line up both the panel edges, as well as the zipper edges. When you get to the zipper, sew just past the zipper tabs—do not sew over the zipper tabs as this will cause bunching. Also ensure that the zipper bulges out towards the lining.
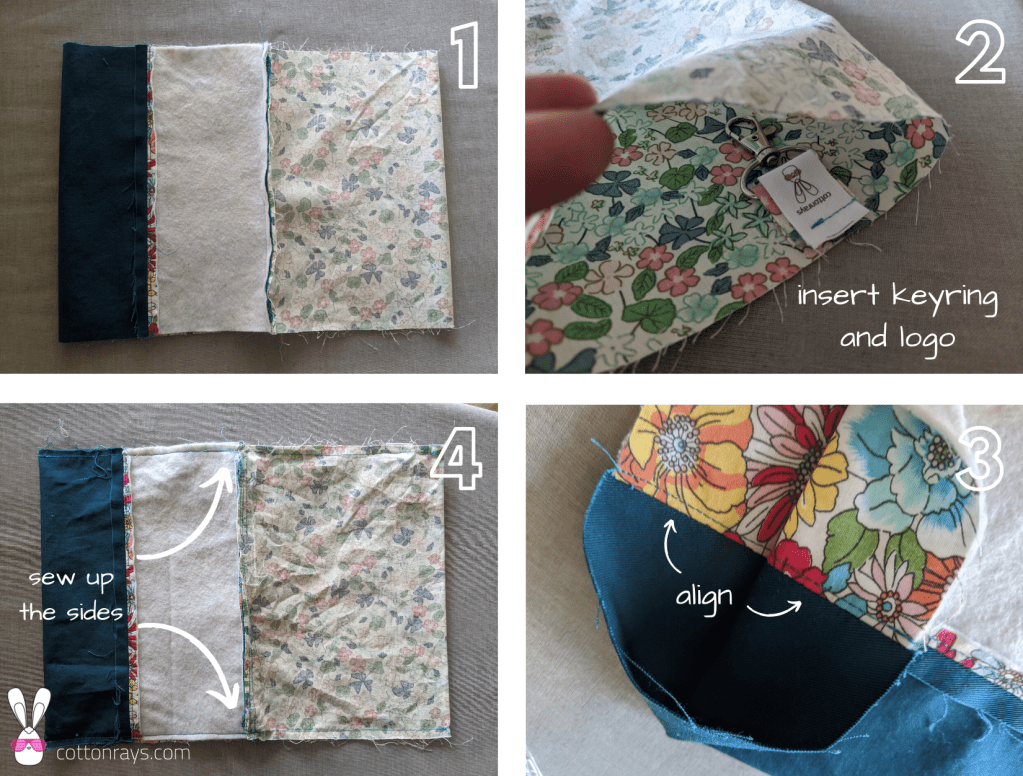
K. Clip off corners, making sure to avoid cutting any seams. Turn the pouch out from the gap left in Step I, and push out the corners. Top stitch to close the gap.


Leave a comment